
 Abstract
Oblique illumination is the oldest known interference contrast method in microscopy research. As a new paper is on its way to be published, I will quickly illustrate some important steps to optimal adjustment of oblique illumination using a bright field microscope.
Practical adjustment to oblique illumination
Modern bright field microscopes often are equipped with a condenser, that provides a rotating modulator disc to select between bright field, phase contrast or dark field illumination. Such a condenser can easily be used to realise oblique illumination. Select an objective with low magnification, e.g. 10x. First rotate the modulator to select bright field stop to illuminate your sample. Pull out your eyepiece and look into the tube. The rear lens of the objective shall now be evenly illuminated. Now, slowly turn the modulator, until the rear lens is exactly half illuminated. See below picture for reference. This simple "trick" to adjust oblique illumination in this way half way from the center of the objective provides optimal contrast for photomicrography without additional deep shadows or bright lights.
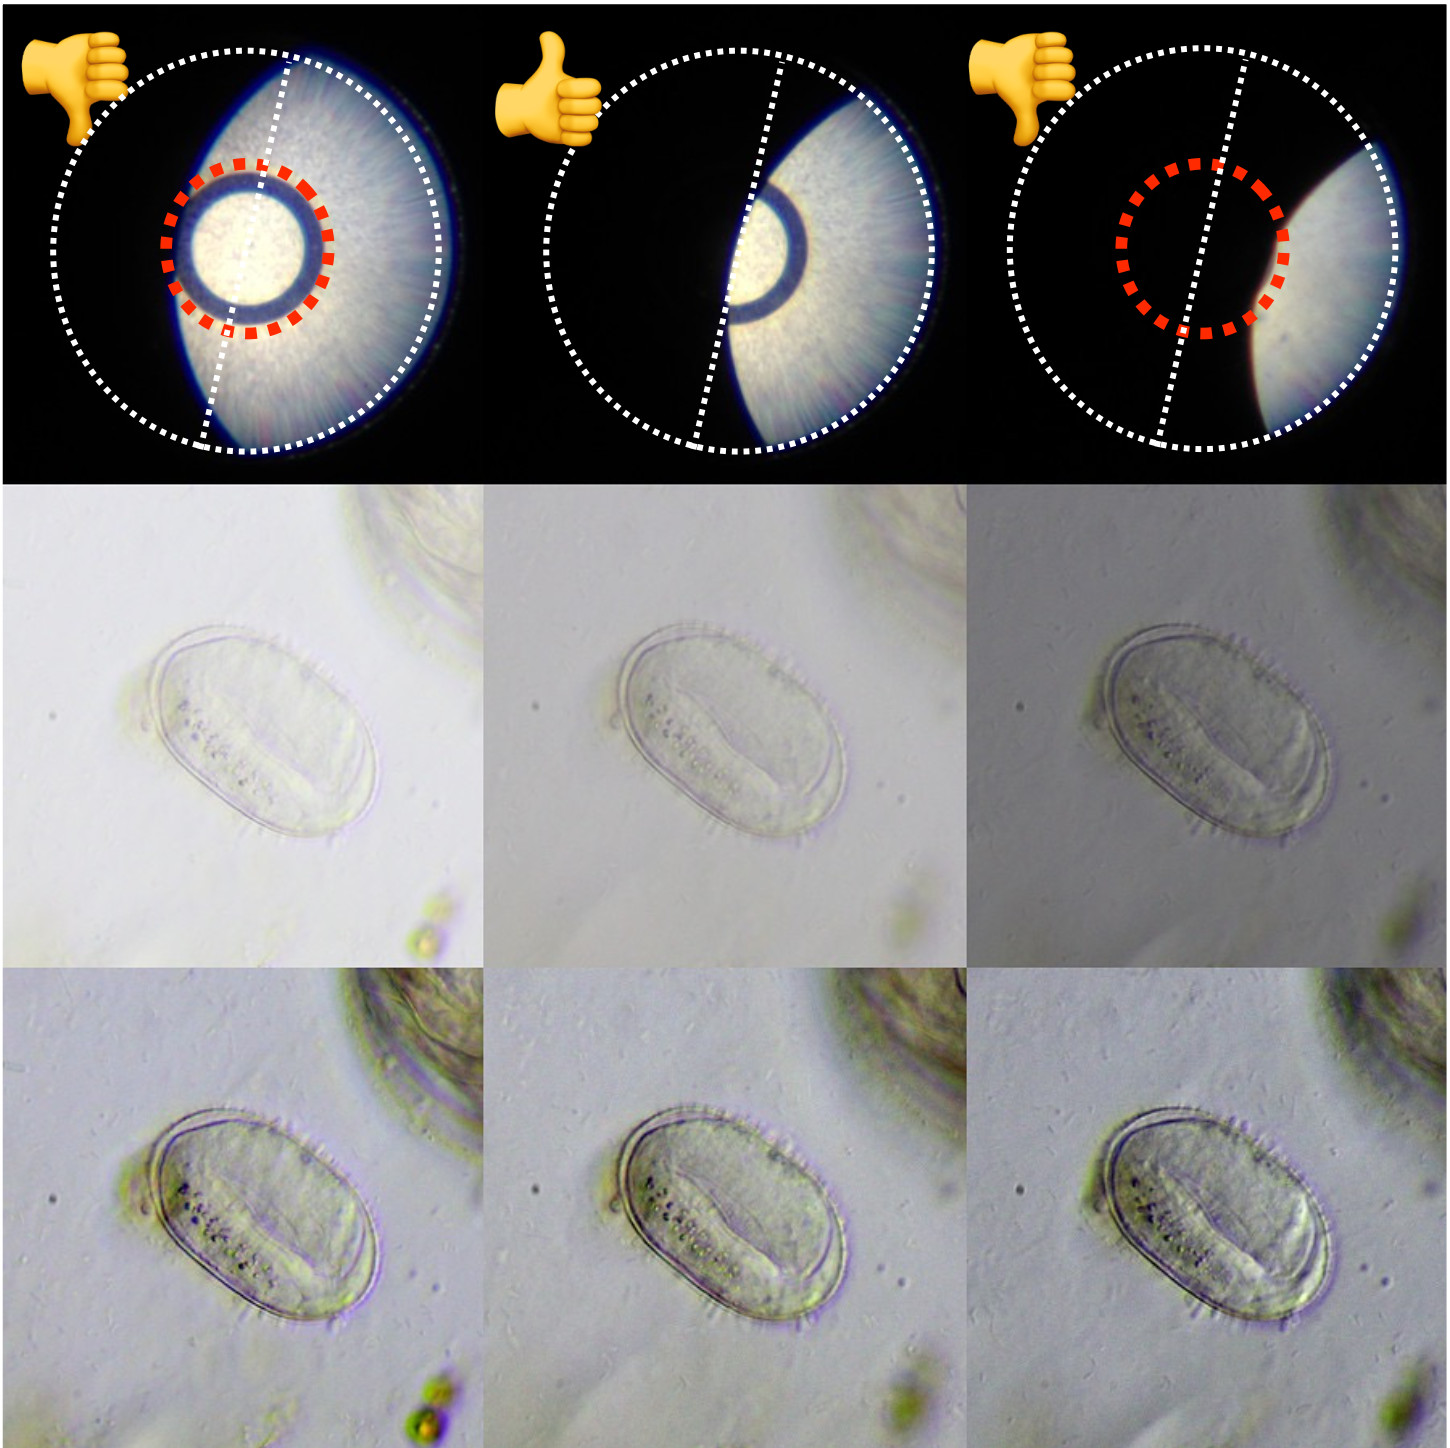
Figure 1: Egg of a gastrotrich in oblique illumination. Top row: Different selected positions of the bright field stop, more than half illuminated (left), exactly half obstructed (middle), and towards extreme oblique illumination (right). Middle row: Result of the microphotographs without further image processing. Bottom row: Results after equalization of contrast. As one can see the middle position provides the best contrasted result, free from artifacts, like broad shadows or broad bright borders.
Image processing using a computer
Many of my personal bright field photomicrographs have been taken using "perfect oblique illumination", using the above mentioned optimal adjustment of the bright field stop of the condenser. Additional image processing allows for digital exposure. Which of the methods to enhance the images depends on the coloring or transparency of the target. The following procedure to digital exposure applies to transparent objects, that will enhanced by oblique illumination, but still suffer from low contrast.
Digital photographs will often be saved or shown using a non-linear gamma correction, that looks like the arc of a square root function [╭]. This shall be corrected first by a "negative" gamma that looks like the square function [╯]. This will correct intensities to be almost linear. The very transparent objects will now look like the middle sample of below photomicrograph of a ciliate. Additionally onw may carefully adjust contrast to pull low intensities more towards black. Be careful not to clip intensities.
Shown here is a picture of Colpidium sp., a small ciliate of 35-50 µm length. From left to right the same image is shown without linearisation (left), with linearisation (middle) and additional pulling the contrast (right). Many details of the ciliate, like the ciliary pattern, opening of the mouth and a new phagosom at the end of the oral cavity can now be seen much better.
Figure 2: Picture of a ciliate of genus Colpidium using optimal oblique illumination plus additional digital exposure. Left: Unprocessed raw picture, with gamma value of 1.8. Middle: Linearised image (inverted gamma). Right: Contrast is enhanced by carefully pulling grey level towards black. Such high-contrast processing is possible only for the very transparent targets.
Literature
Bauer, T. Die perfekte schiefe Beleuchtung. (german, with english abstract) Mikroskopie 4/2020. Dustri Verlag.