
 Part 2: Sample preparation
In this second part of the series the principal steps of sample preparation and immersion of the water immersion objective will be described.
Overview about all parts of this series:
- Part 1: Cleaning optics
- Part 2: Sample preparation
- Part 3: High resolution images with oblique illumination (in preparation)
Water immersion objectives
Water immersion objektives are special optics, that are optimized for observations of water preparations, like cell cultures or tissue samples, plankton samples, yeasts, fungus or water preprations of fresh plant tissue dissections. Water samples result in problems when using dry objectives or oil immersion objectives. Because the diffractive index of the water medium is different from air or oil, spherical aberration will occur. Different light beams from the sample focal plane to the objective will be diffracted differently. This results in blurred images lacking contrast. This problem will be solved by water immersion objective: They are constructed in a way, that they will be immersed using a drop of water. This avoids different light paths from observation of water samples and thus provides superior image quality, even if the focal plane is found deep below the cover slide in the sample.
Dipped objectives
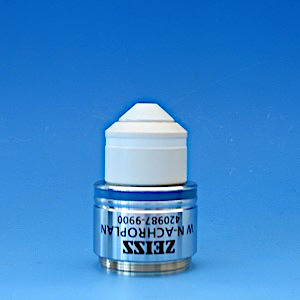 This type of water immersion objectives will be used without cover slide. These objectives are used in cell physiology. Cultures or samples are observed by dipping the immersion objective direct into the (culture) medium. Certain older multi-immersion objectives from the Zeiss Standard series, early infinity RMS optics and also current LD LCI objectives also support this technique. The correction collar can be set to zero or a symbol for "no cover slide". Modern dipping immersion objectives instead have a protection cover to prevent corrosion while using them dipped into corrosive culture medium.
Sample preparation for this type of objective is easy: Samples typically are prepared in petri dishes, the objective will be dipped directly into the medium. For observation of plankton samples this technique is not very useful, however. Dipped objectives require cells are fixed at the bottom of the petri dish. This is not the case with free swimming plankton organisms. The dipped objective will constantly push the organisms away from the field of view while moving the specimen stage or focus.
High-end objectives
Because the dipped type of immersion objectives is not useful for many cases, like observations of free swimming plankton organisms, special objectives are built to support the use of a cover slide. These objectives typically have a correction collar to adjust the optics to be used with different thickness of the cover slide. This is very similar to the early objectives, that were built by Hartnack around the year 1850. Modern objectives not only support adjustment to cover slides, but also include temperature compensation. This is because different temperatures will cause variations of the diffractive index of media and objective. Recent microscope objectives also include heat insulation to avoid heat transfer between the microscope objective and sample. Current objectives also support highest resolution and contrast from large numerical aperture of the objective (NA≤1.3). Some types also support different refractive immersion media (water, glycerol). Glycerol is sometimes a medium of choice for tissue samples.
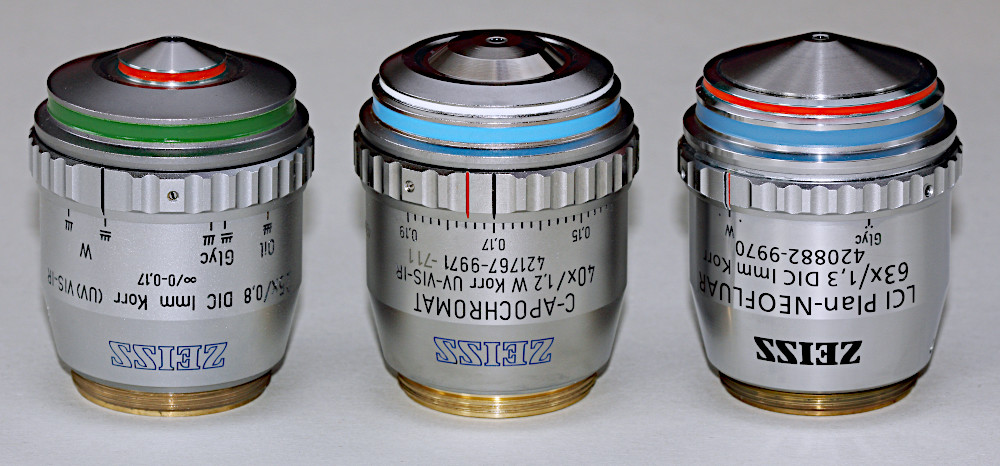
Figure: Modern water immersion objectives with magnification 25x, 40x und 63x. A correction collar allows for compensation of cover slide thickness. Left: Objective LD LCI Plan-Apochromat 25x/0,8 for multi-immersion (water, glycerol or oil). Right: Objektives of high aperture and magnification with temperature compensation and heat insulation: C-Apochromat 40x/1,2 W and LCI Plan-Neofluar 63x/1,3 DIC. Temperature compensation for 23°C is indicated by a black mark and 37°C is indicated by a red mark, respectively.
Preparation of specimen slides
When buying microscopic specimen slides, one shall take into account the purpose of the slides. There exist microscopic specimen slides with special coating useful for preparations in histology. Such slides aren't meant for life-cell imaging. Specimen slides made of simple inert glass are the best choice for live cell imaging. But there may occur situations when specimen slides may provide residuals from factory cleaning. Sometimes fluorescent markers may stain such residuals resulting in a bright background illumination. Even new specimen slides sometimes may provide visual residuals from factory cleaning the glass surface.
Specimen slides are best cleaned by breathing upon the slide and wipe away the wet from the surface with a dry cleaning paper. One shall never use optical cleaning fluids or wet cleaning papers. These fluids typically contain alcohols, detergents or other organic cleaning solutions. Small residuals of the cleaning solutions will always remain, which do not only leave films, but also harm living organisms. Certain colleagues already reported to me, that they used optical cleaning fluids or special wet cleaning paper to clean the surface of the specimen slide, wondering why organisms in sample preparations always died early. Specimen slides stored for many years may build up films from the cleaning procedure or biofilms developed over years. If specimen slides cannot be cleaned by simply breathing upon it, and films may remain from visual inspection, they should be discarded. Eventually try another product from a different manufacturer on a case by case decision.
Cover slides sometimes show contamination from glass chips or dust. They can be easily cleaned using a dry cleaning paper. Use latex or nitrile gloves to prevent finger prints and injury. Hold the cover slide between fingers of one hand and use the cleaning paper between thumb and forefinger of the other hand. Wipe dust carefully from the center towards the border of the cover slide without breaking the glass.
Tip: If you are an ambitious observer in photomicrography and expect best image quality, always consider glass slides are consumables. Consider fluorochromes are used diluted at very low concentration. Cross-contamination of fluorochromes is hard to detect and results cannot be interpreted well. Especially when used with fluorochromes, specimen slides and cover glasses should be discarded and not reused after observation.
Stabilization of the cover slide
Using a water immersion objective a small drop of water will be brought between the objective and cover slide. As with oil immersion, there is a special problem: Surface tension of the immersion fluid will pull or push the cover slide when moving the specimen stage or focus knob. This results in unwanted object movement of the sample organisms. In worst case specimen may burst from squash or rupture.
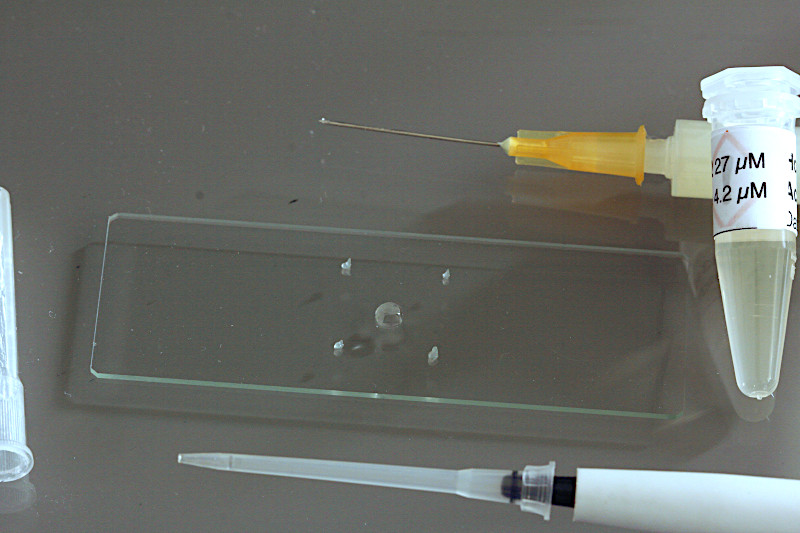
Vaseline dots are a simple answer to the problem. A small syringe filled with vaseline is one of the best methods to build stabilizing vaseline dots upon the specimen slide. Another innovative preparation of the microscopic micro-aquarium is described by Michael Müller (German only).
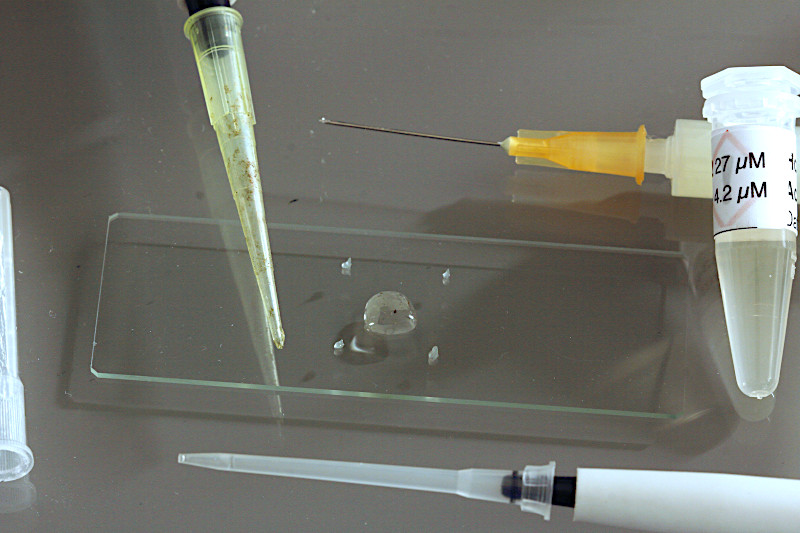
A typical preparation of the specimen slide using vaseline dots will be shown here. With the tip of the syringe injection needle small dots of vaseline are placed at the corners of the cover slide. A self-made printed gauge on a sheet of paper may support proper placement of the vaseline dots.

Using a small-sized adjustable micropipette (2-20 µl) a volume of 5µl of the staining fluorochrome mixture is placed in the middle of the specimen slide. If plankton samples shall be prepared without staining, this step is obsolete.
Using a mid-sized adjustable micropipette (20-200 µl) about 25 µl of the sample will be dropped on top of the staining solution. Take care the sample pipette will not touch the stain, if so, replace the tip of the pipette later. Larger ciliate species or crustaceans will require larger sample volumes of 50-100 µl, depending on thickness of the species.
In the final step the coverslide will be carefully placed on to of the vaseline tips. Now, the sample preparation is ready for life-cell imaging using the water immersion objective.

Immersion procedure
As soon, as the specimen slide is ready, it will be placed onto the specimen stage of the upright microscope. Switch on the light and check for proper Koehler adjustment according to manufacturers specification, if necessary. Using a low magnification dry objective 5x or 10x the sample is scanned for objects of interest. A high quality microscope will provide objectives, that are parfocal. That means, changing the objective the focal plane will not change. However, immersion objectives shall not be switched just rotating the rotating objective mount.
Before switching to the immersion objective, lower the specimen stage. One full rotation of the coarse focus knob should be sufficient, resulting in a working distance should large enough to place a drop of distilled or deionized water using a small pipette. Special immersion media provided by the manufacturer can be used as well. Ensure the immersion medium has the proper refractive index similar to water or is marked as "water", like Immersol W. Although your objective might support different immersion media, never use oil or glycerol immersion media for water preparations.
Carefully switch to the immersion objective. Check, if the objective is adjusted to W (water immersion medium), proper cover slide thickness and temperature compensation. Rotate the correction collar to proper adjustment, if necessary. See illustration for the types of correction collars provided with the different objective types shown above. Ensure the drop was small enough and does not touch the front lens at this stage.
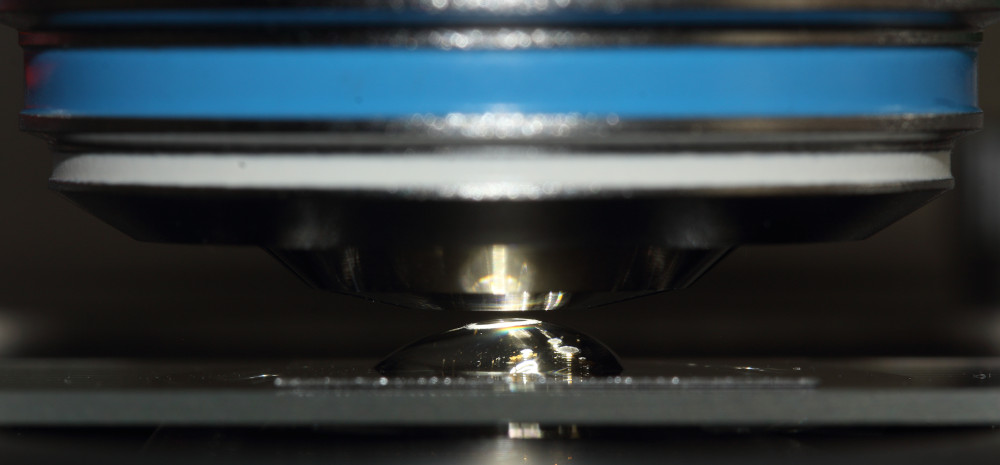
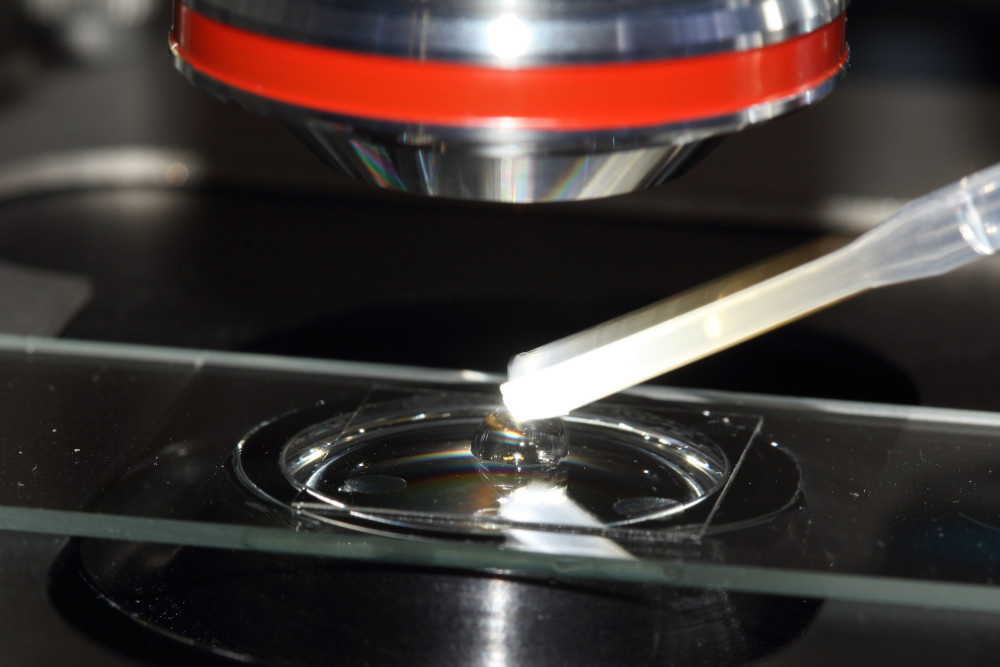
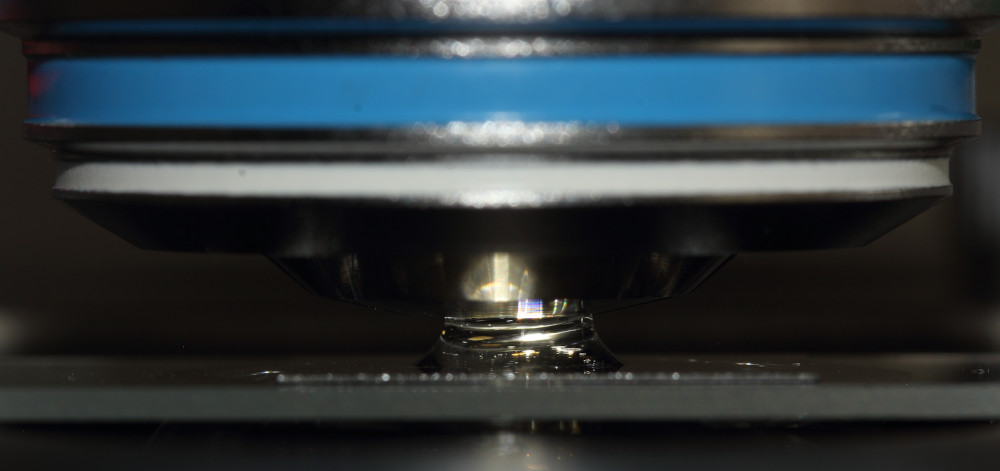
Carefully raise the specimen stage, until the drop will touch the front lens of the objective. At this moment, an immediate change of illumination within the drop and field of view will be easily noticed.
Avoid directly moving the objective from one side into the water drop. On one hand, there is certain danger to break the cover slide, if objectives from different epochs are mixed on an amateur microscope stand, that are not parfocal. Moving the objective from a side may easily result in air bubbles between the front lens and cover slide. Air bubbles in the light beam will result in poor image quality. The easiest way to check for bubbles: Pull the eyepiece and look at the exit pupil of the objective. Air bubbles at either the immersed objective or condensor (see third part of this series) are easily seen in the exit pupil of the objective. If air bubbles are found in the small drop, lower the specimen stage again, clean objective surface and pull the remaining drop off the cover slide using a small snippet of a dry cleaning paper. Then start over again with the immersion procedure, eventually lowering the specimen stage one more rotation.
Now carefully focus the sample. A limiter at the specimen stage should avoid to break the cover slide. It shall be properly adjusted. If you don't know proper adjustment of the height limit take care while focussing the sample preparation. After a while you will get more and more experienced with this special preparation and love the brilliant image quality, a water immersion objective will provide.
In the last part of my series, I will describe how to use a high aperture water immersion objective for highest resolution using oblique illumination. A special microscope condensor will play an important role in this last part of the story...